What would you usually do to the parts in your old laptop or PC? Most of the people would just leave the laptop/PC at a corner of the store room or cupboard, leaving them collecting dust. But do you know that the harddisk still can be use. Okay, only if the old laptop or PC is not broken because of a failed harddisk. Otherwise the harddisk can be converted to an external harddisk or most of the time being marketed as "portable storage". This is a tutorial of of DIY portable storage.
So what you supposed to do?
Step 1: Reaching to the hard disk
Open up the old (or broken) laptop or PC. PC would be easier, while laptop might be a bit tricky. Since you are sure you are not going to use the laptop anymore, don't worry too much of breaking the laptop because it is already broken. :) If you preferred to "follow the instruction", try google around on "service manual of xxx", replace xxx with the laptop brand and model. Usually you can find it at second or third page of google result, if not on first page.
Step 2: Hard disk care
After you have dismantle the PC or laptop, take out the hard disk. It might attached to some metal or plastic mold, unscrew or remove it. Now you have your hard disk. Remember to avoid static shock to it, even though it is designed to have static protection, but an extra step is not too much to do right? How to prevent static shock? Do not put it in plastic bags, except those static prove plastic bags which is designed to store RAM and hard disks. Touch your finger with anything made from metal before touching the hard disk.
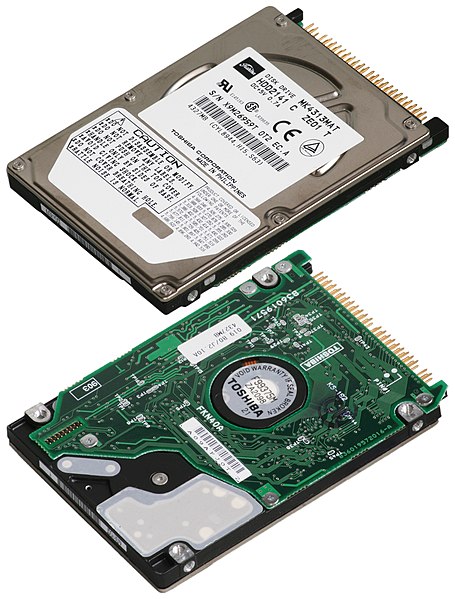
Step 3: Identifying the hard disk and buying suitable external casing
Now identify your hard disk before you buying the external casing. Usually PC hard disk uses 3.5 inch hard disk (because it is cheaper) and laptop uses 2.5 inch hard disk. Another thing to check is the interface, either it is parallel ATA (PATA) or serial ATA (SATA). Try to avoid casing with both PATA and SATA, because it is much more expensive compare to those case with either one interface. Another suggestion I have if you still not sure, bring over the hard disk to the computer shop or gadget shop or walmart or best buy or whatever, the people at the shop should be able to help you to find the right external casing for your hard disk. Try assemble it on the spot just to make sure it fits properly.
 |
| Different sizes |
 |
| SATA |
 |
| Parallel ATA |
 |
| Fancy casing |
 |
| Simple casing |
Step 4: Checking the portable storage
It is not done yet. Hook up the external hard disk that you just DIY to a working PC or laptop (not with the one you just taking apart in Step1, hahah). See if it can be detect by the PC or laptop. If the OS is Windows XP and newer, it should able to detect and install the right driver for it. Wait for the driver to install (might take up to a few minutes, depend on the speed of the PC/laptop), open Windows Explorer or whatever file explorer you like to use, you should able to see the content of the hard disk.
Step 5: Back up old data
If you want to wipe the whole of this external hard disk (read "format"), be sure to back up files on this hard disk that you wanted to another hard disk.

Step 6: Partitions
This is an additional step if you wanted to combine the partitions. For many branded PC or laptop, the company or computer shop will partition the hard disk to at least 2 partitions for all new system, one for the Windows OS and another one for others stuffs that you install, downloads or whatsoever. There is no problem leaving them as it is but personally I don't like too many partitions. I like the single, and big (if not huge) partition only for each disk. For this step, use free partition software such as EaseUS Partition Master. What we need here is combining the partitions, so there is no need to buy those expensive partition managing software. Remember to back up (Step 5) before you merge the partitions.

Step 7: Enjoy the DIY external storage
Since this is a very low cost project (assuming the hard disk is free of cost, you only paying for the external casing), I would use this as additional storage for music and movie. Since the hard disk is kind of old (if the PC/laptop was under heavy usage), I am putting the not-so-important files on this hard disk. For other important files, I will have the back up on another but new external hard disk.
My experience
Recently I DIY another external storage by using the old hard disk on my brother's broken Dell laptop. Even though it is only 200GB (consider nowadays the common capacity on new hard disk is 500GB to 2 TB), it is good enough to storage a lot of music and movie files. I also throw all the flv (nusery songs) that I saved from youtube into this external storage and let my kids watch it on LCD TV.
Example:
http://outdatedpenanguncle.blogspot.com/2012/02/download-youtube-video-with-jdownloader.html
Like this if you are FB user and you think this post is useful. The button is at top right of content of this post.
+1 this post if you are Google+ users and you think this post is useful.
Hope you will enjoy this post, subscribe to my RSS or mailing list or follow me on blogger or twitter. :)
source: I wrote this tutorial!
pix source: commons.wikimedia.org


No comments:
Post a Comment